Opening
Greeting youtube. This is Phoenicorn from art graphics hub. Hope your doing well.
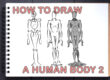
Today we are going to be drawing the first part of a persons body starting with the most part, the stick figure base. Feel free to follow along or if you just want to watch that’s fine too.
Oh and don’t forget to share like, tap the bell icon and share with your friends as this helps a lot.
So with that out the way, lets ensure we are comfy, take a nice deep relaxing breath and lets begin.
Step 1: Page setup
Did you that the average human body is around 7 and a half heads heigh? For the first step we are just going to round up to 8 heads. Having an appreciation of this will keep your body proportions somewhat realistic.
On the left hand side lightly draw a straight line. Make this line as long as you can but be sure to keep it light. Keeping this line long will make dividing in to 8 parts that much easier.
Next with your line mark the half way point with another line. Divided both new halves in to halves so you now have 4 parts, then once more divide in half to make 8.
Now that we have a rough measurements its time for the next step.
Step 2: The head 8 heads.
This next part is kind of fun to experiment with so feel free to try this on a new page.
I feel its always a good idea to draw the head 8 times at the side. this isn’t as daunting as it sounds.
We simply start with a circle and a cross. This is so we have a guide for the facial features. At the bottom of the cross we draw a guideline for the chin.
Now we just need to connect the chin to the circle. You can even draw the eyes, mouth and ears here if you like. This is your drawing so feel free to experiment with the height and shape.
When your happy with your face lets draw him in our guide lines.
Step 3 drawing the stick figure
So how did you do with that part? This is a great way to warm up for drawing figures. Lets get our stick figure drawn. Using your drawn heads as a guide lets draw a new line and put him together.
Draw the head in and around a quarter into the next section lets draw a line with a slight curve. Think of it like a bit of an umbrella.
at around about a heads width draw a circle for shoulders to close the line off.
Next we find the bellybutton. Lets make him an innie. There it is. Lets draw 3 ovals. One large one for the chest and 2 small ones for the hips. Once we’ve done that lets put 2 dots around about shoulders width at the belly button level. These will be our elbows.
Now in the chest area lets draw another umbrella curve for the bottom of the rib cage.
2 circles for knees right between the bottom of the hips and the bottom of your main line. 2 triangles for feet at the bottom. 2 more ovals for hands. Right in the middle of the upper legs.Lets make the ovals around about the size of the head.
Now all that is left to do is connect the limbs but lets try using a very slight curve.
Closing
And there you have it. I’d love to see your work so if you like feel free to use the twitter #artgraphicshubstickfigure. I’ll try to respond to everyone. Theres also links to recommended books that helped me on my art journey in the description.
Remember drawing is more about the journey and less about the destination. Much like a road trip with friends on a sunny day. So long as your having fun it doesn’t mater where you end up.
Ive been Phoenicorn for Art Graphics Hub and I hope to see you next time.